![]() |
Many people see a promotional picture for an item and think all they have to do is buy that product and picture will come out immediately with the push of a button. Very rarely is one product going to be able to carry an entire scene. Think of it like an orchestra, many parts contribute to the result. |
For this tutorial, we will use Victoria 4™ from Daz3D®, which is very widely used in Poser® at this time.
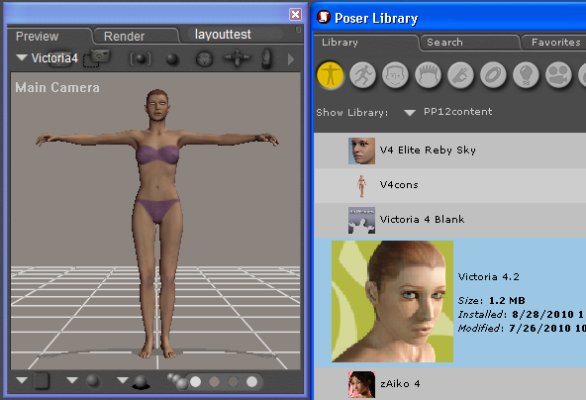
We start by loading Victoria 4 (referred to as V4 going forward) figure into scene. V4 is not part of the default Poser installation. The base figure can be
obtained from DAZ Productions at a reasonable cost or sometimes at no cost. After installing, it will be in one of the "Figures" folders. Don't mistake a pose, prop or other file for the figure.
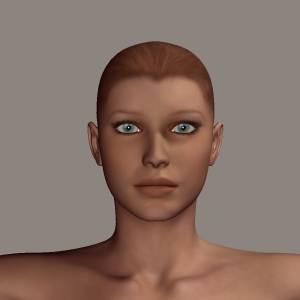
Many people new to the program mistake a character package for the figure. By default, she loads at center (xz = 0,0) in a standard T-position. This position represents zero rotation for all joints. |
![]() ![]() ![]() |
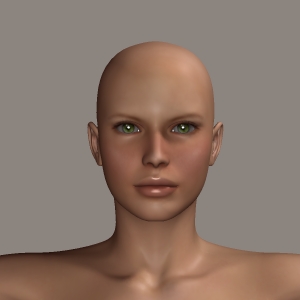
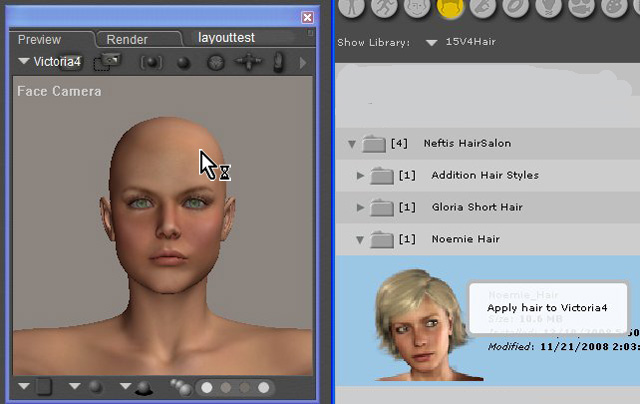
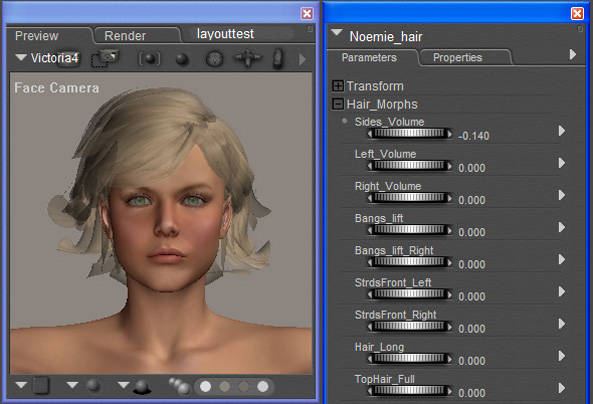
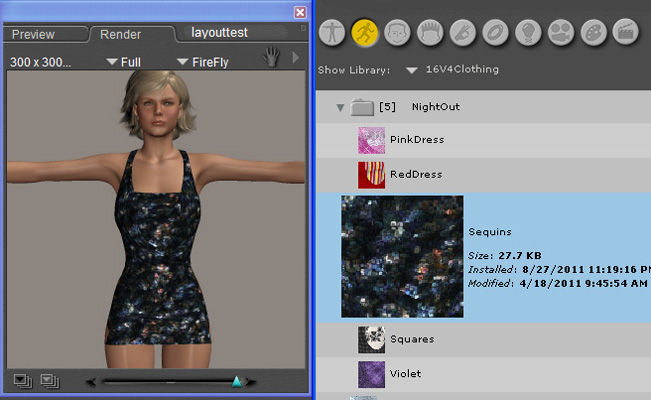
Next, we will add a texture and morphs to our basic figure. Now, some people will click on the morph injection pose and find that nothing appears to happen.
Most packages require that you have "Morphs++" installed. Again, this package is available from DAZ, and makes possible many customization options.
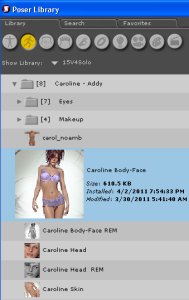
There are a few merchants that sell custom morphs that do not require "Morphs++". Another reason it would appear not to work is the the injection pose only injected the
value and not the morph. Most merchants have "readscript" lines inside the pose that inject the morphs needed. If they did not include this little nicety, you will have to inject
the morphs individually or just put in all of them with the inclusive pose provided with "Morphs++". A word of caution, the entire package contains about 330 morphs and can add substantial
memory requirements, so it's best to use only those that you need. For this tutorial, I am going to use a character package called "Caroline" by Addy (available from DAZ).
At this point I should say that I have no financial interest in any DAZ products.
About 90% of the content I purchase for Poser, Carrara or DAZ Studio comes from their store because of wide variety and quality, not because I get paid for mentioning anything.
|
![]() |
![]() |
![]() |
![]() |
These are all applied from the Pose folder for "Caroline" |
While we are looking at head, we should pick out a hairstyle. There are three types of hair available, Conforming, Prop, and Dynamic.
For this discussion, we will only consider the first two. Placing the hair is simple enough, just drag on drop from folder onto figure. When adding prop hair, the advisory message says "Apply hair to Victoria 4" when in proper spot. For conforming hair, the advisory message is "Add and conform figure to Victoria 4". The method is pretty straight forward, the messages just guide you in not putting the hair on inappropriate location (like a chair or other scene object). Most hair contains morphs for adjustment and styling. You will be able to see them in the properties panel, however on conforming hair, you may have to select neck or head to find morphs. |
||
![]() ![]() ![]() |
If you are only doing a head shot or figure study, you can get by without adding clothes. The rest of the time our model needs to wear something.
Placing any conforming article is simple enough, just drag on drop from folder onto figure. This particular outfit is untextured, so we will choose from color schemes that were supplied with the package.
In this case, a pose folder contained the color scheme application. Many vendors still use the so-called MAT pose for compatability with earlier versions of Poser,
but more are moving to Material Collections (.mc6) which is a native poser format and does not require special tools to create. Applying the "magnetize" pose to the clothing enables extra deformers to minimize poke through. |
||
![]() ![]() ![]() |
Shoes are very important and getting a believable fit contributes greatly to a realistic pose. I prefer to have a shoe fit rather than just stick foot in and make it invisible.
Some shoes come with a fit pose, which saves some time. In most cases, the only the rotations of the foot and toe need to be adjusted for a proper fit, but there are some fit morphs available for extreme shoe styles. |
||
![]() ![]() ![]() |
Now we have our clothed model in the very unglamorous T-position. There are pose sets available for almost every position or action that you can imagine.
Almost any premade pose will need adjustment after applying, due to differences in the figure and how the clothing is conformed. |
![]() ![]() ![]() |