
This is a walkthru on adding morphs to the Genesis 2 figure in DAZ Studio 4.6
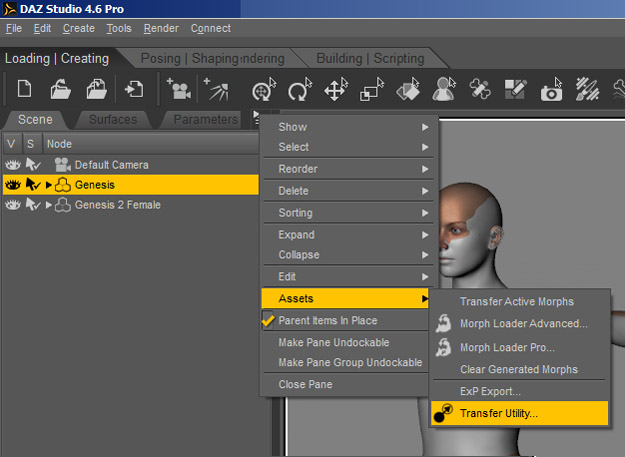
Then invoke Transfer Utility from active pane options tab.
|
This is a walkthru on adding morphs to the Genesis 2 figure in DAZ Studio 4.6 |
| First, load Genesis and Genesis 2. It doesn't matter if they are on top of each other. Then invoke Transfer Utility from active pane options tab. |
|
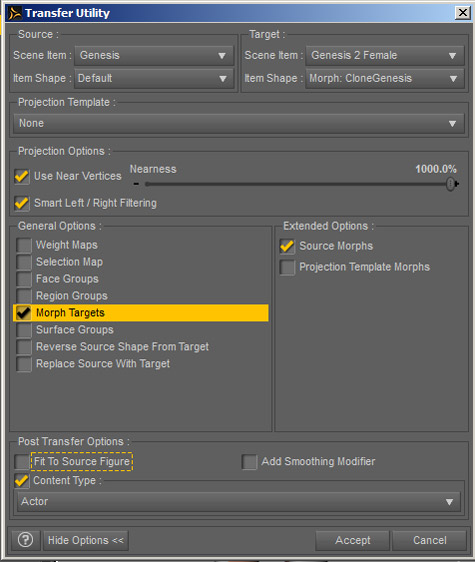
Add the source and target figures to boxes. Only check boxes that are shown.
|
 |
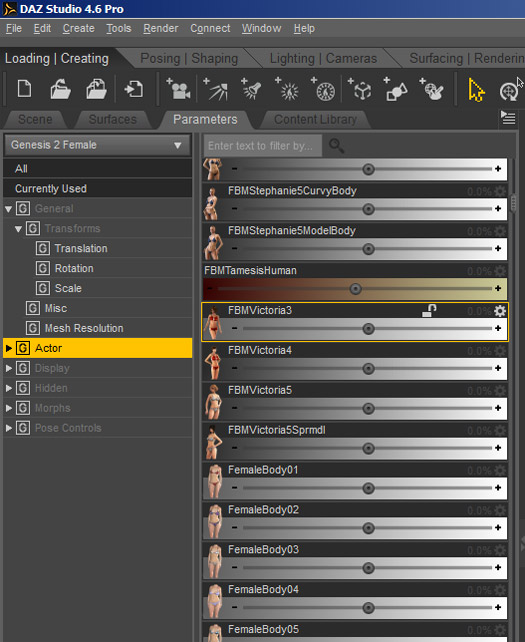
| We can delete the first Genesis figure. Check the parameters tab for Genesis 2 and you should see the newly added morphs. | |
 |
|
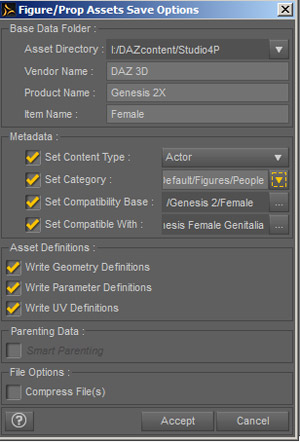
| We will now save our newly modified figure under a different name and folder. I changed the product name to Genesis 2X. If you have the Genesis 2 genitalia (or plan on getting it) you can add it in compatability box. |
 |